Your First Conversation
By the end of this page you'll have a working website inbox and you'll have replied to your very first customer message.
You'll need: A ChannelX account and any website where you can paste a snippet of code. No website handy? You can test on a local HTML file or use the built-in widget preview.
Set up your first inbox: Website live chat
We'll use the website channel because it's the fastest way to see ChannelX working end to end.
Step 1 — Open the inbox setup. From the dashboard, go to Settings → Inboxes → Add Inbox.
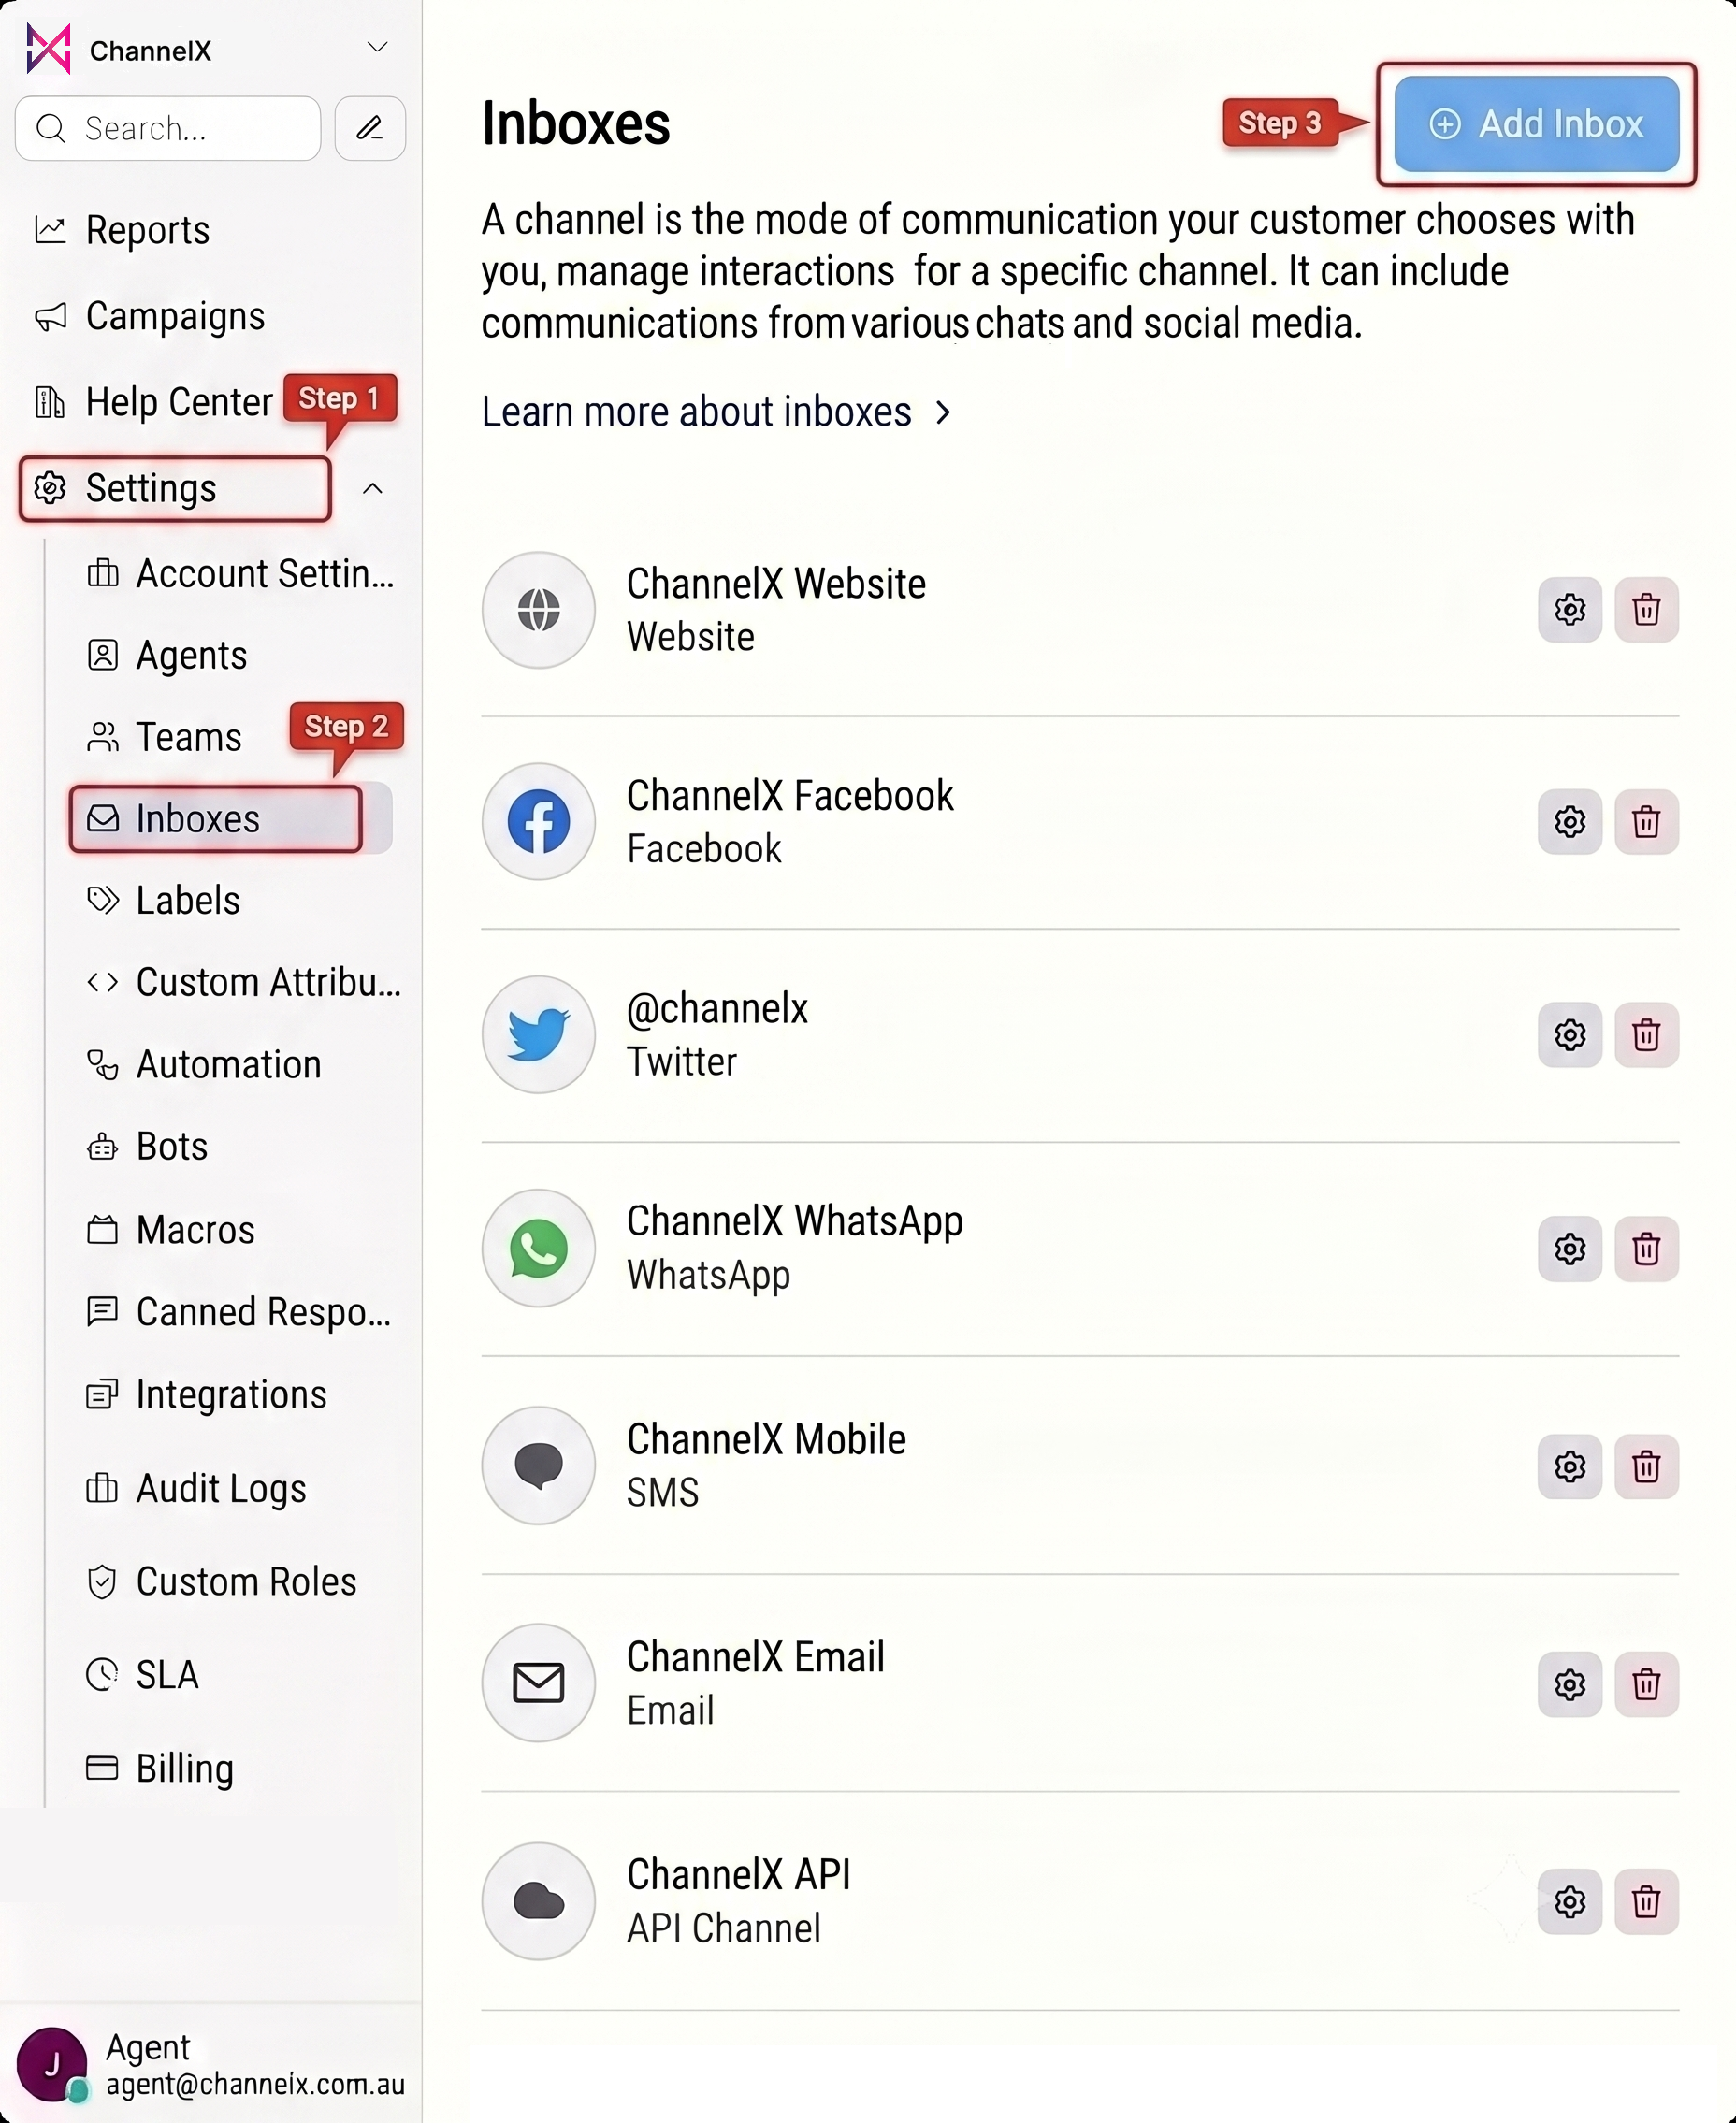
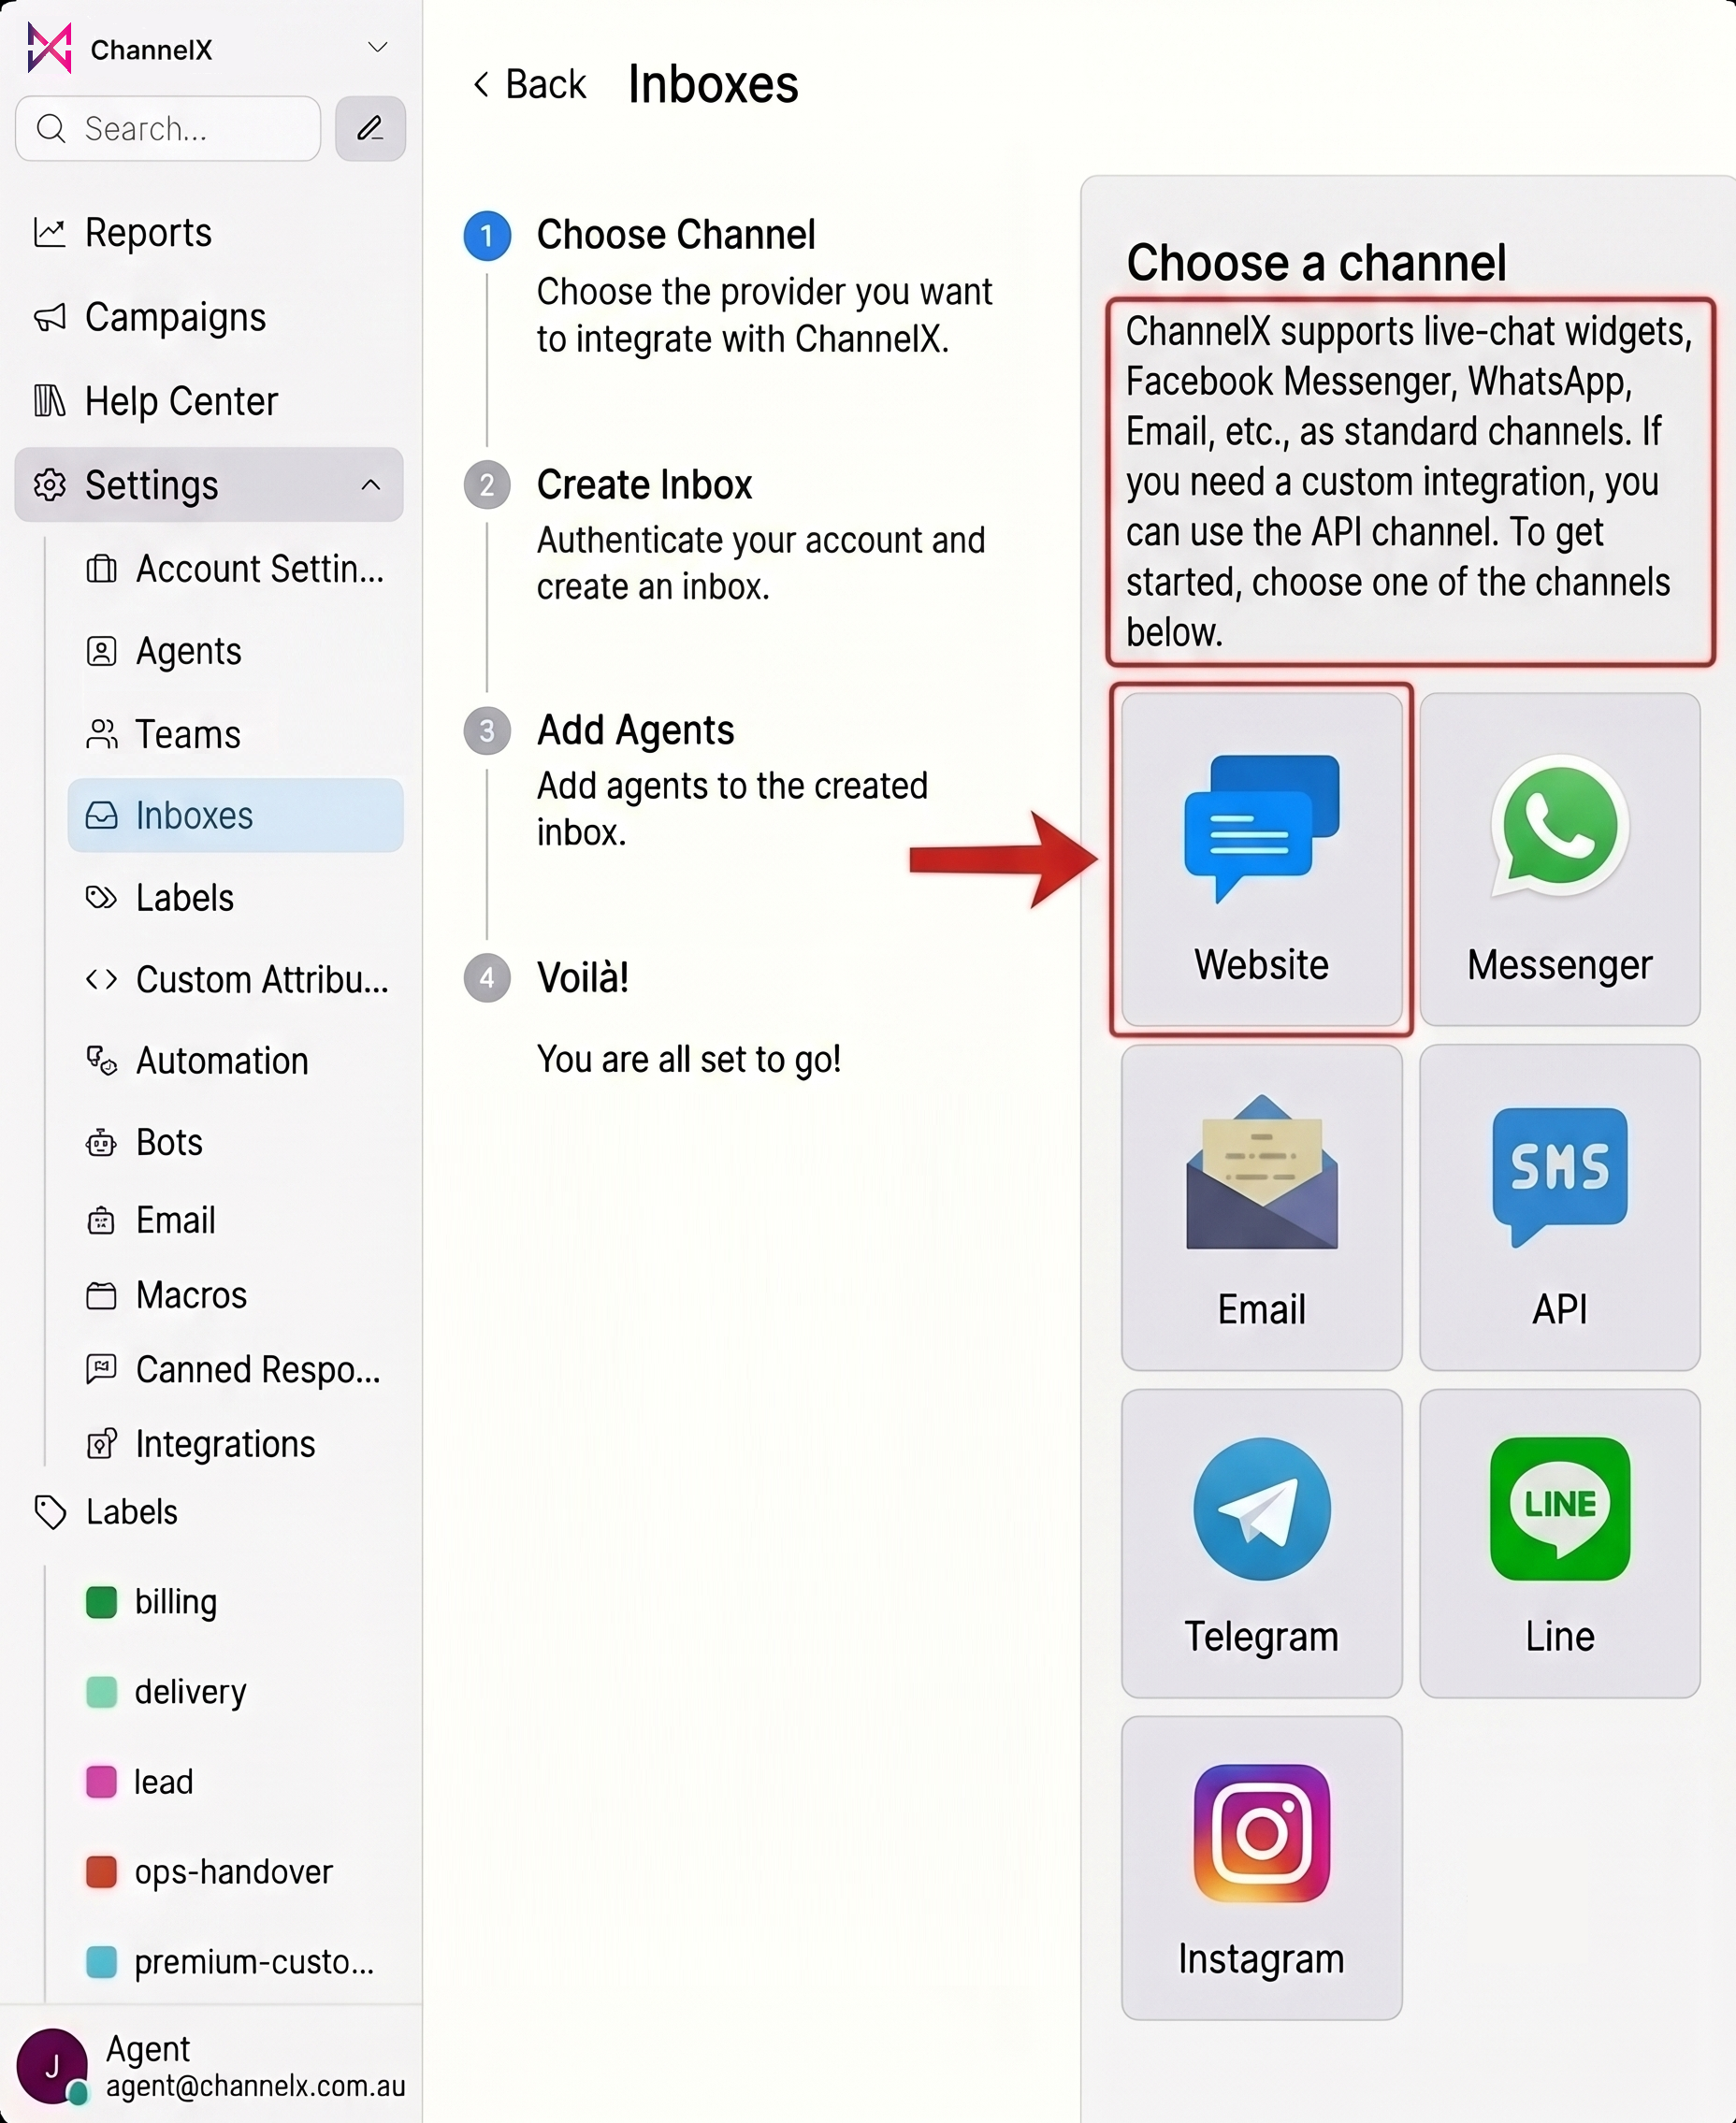
Step 2 — Pick "Website". You'll see a grid of channel types. Click the Website icon.
Step 3 — Fill in the basics.
- Website Name — what customers see at the top of the chat widget (e.g. Localcom Support).
- Website Domain — the URL where the widget will live (e.g.
https://localcom.com.au). - Widget Color — pick something on-brand.
- Welcome Heading & Tagline — the first thing visitors read when they open the widget.
Step 4 — Add agents. Choose which teammates can reply to messages from this inbox. You can change this later.
Step 5 — Install the snippet. ChannelX gives you a small JavaScript snippet. Paste it into your site's <head> (or just before </body>). Reload the page and the chat bubble appears in the corner.
Step 6 — Send a test message. Click the chat bubble on your site, type "Hello from my first visitor!" and send.
Step 7 — Reply from the dashboard. Switch back to ChannelX. The new conversation appears at the top of your conversation list with an unread badge. Click it, type your reply in the box at the bottom, and send. The customer sees it instantly in the widget.
You've just handled your first ChannelX conversation.
A quick tour of the conversation view
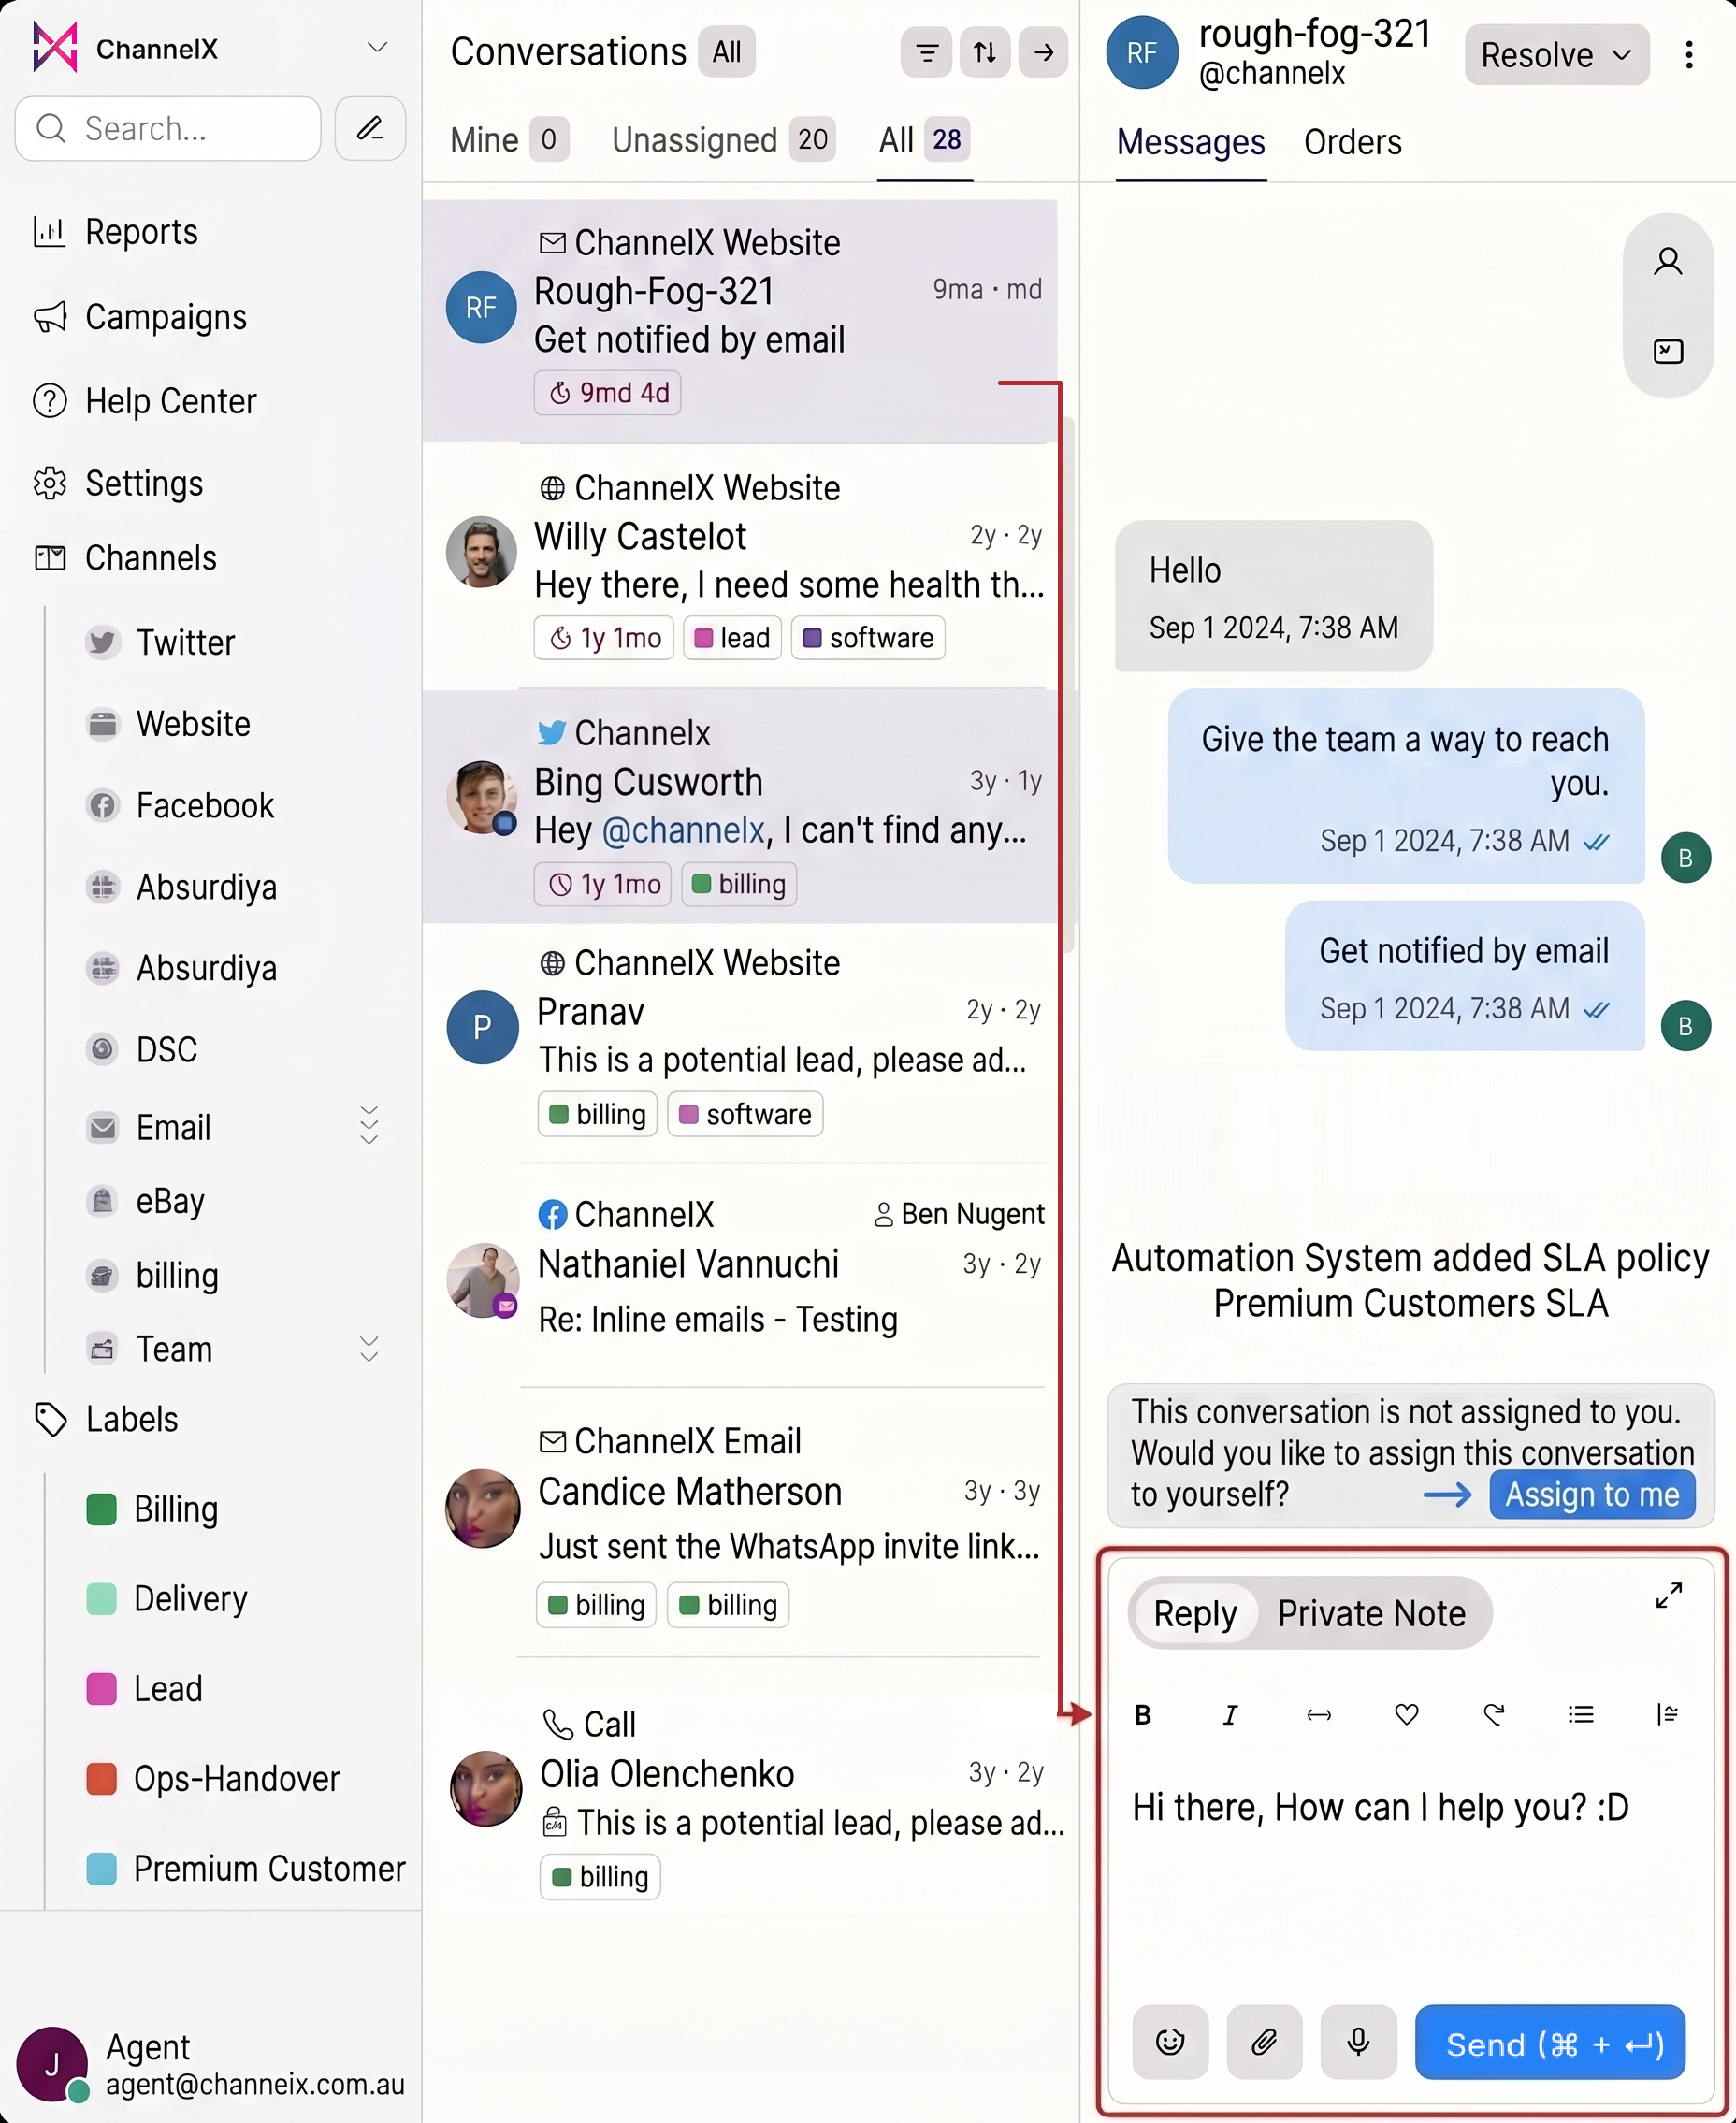
Once you're inside a conversation, here's what each part does at a glance:
| Area | What it's for |
|---|---|
| Reply box | Send public replies to the customer. |
| Private Notes | Discuss the conversation with teammates — the customer never sees these. |
| Right sidebar | Customer details, conversation actions, custom attributes, and previous conversations. |
| Conversation actions | Assign an agent, change status, snooze, add labels. |
| Conversation list (left) | Filter by status, assignee, inbox, label, or saved folder. |
You don't need to use any of these on day one. Replying from the chat box is enough to support real customers.
Resolving the conversation
When you're done helping the customer:
- Click Resolve at the top of the conversation.
- The conversation moves out of your Open queue and into Resolved.
- If you've enabled CSAT, the customer is automatically asked to rate the experience.
If the customer replies after you resolve, the conversation automatically reopens — nothing falls through the cracks.
Common first-day questions
Will the customer see my name? Yes — your display name and avatar from Profile Settings appear on outgoing replies. Set both before replying to a real customer.
Can two agents work on the same conversation? Yes. One agent is the Assignee (owns the reply); others can be added as Conversation Participants to follow along and chime in.
Is anything I type sent immediately? No. Replies only send when you click Send (or press Cmd+Enter / Ctrl+Enter). If you navigate away mid-message, ChannelX keeps a Draft Reply so you don't lose your work.
Next
Continue to Dashboard Basics to learn your way around the platform.